Using Feedback in Vault CRM
Integrated Territory Feedback utilizes both Vault CRM and Align to enable end users to review and provide feedback regarding upcoming changes to the assignments and targets within their territory.
This streamlines the planning process by allowing end-users to view their future territory directly on their device as well as supporting managers with configurable approval processes. In addition, administrators may configure rules to automatically accept or reject certain challenges to that territory.
Considerations
- Integrated Territory Feedback for end users is supported on the iPad
- Territory Feedback supports feedback in both targeting and non-targeting projects. In targeting projects, end users are additionally able to view targets and their goals, and make changes to them.
- It is recommended to define default goals for channels and products. This helps end users by presenting them with preset goals when adding a target, which they can then adjust.
-
If manual data changes occur while Feedback is available, for example if the admin manually adjusts a target’s goal, admins must select the Recalculate Territory Data action in Align for the appropriate field force to refresh the cache with the updated data.
If this action is not performed, data displayed to end users may be out of date.
- The following features are not supported:
- Ranked Field Forces
- Instruction text containing Markdown formatting
- Territory Feedback cannot be used for field user territories with more than 30,000 account assignments
Configuring Integrated Territory Feedback
To configure this feature:
-
Ensure the following features are enabled:
- Ensure a model project exists in Align in a Feedback Review state
Viewing the Territory Dashboard
To access feedback, navigate to the Territory Feedback tab.
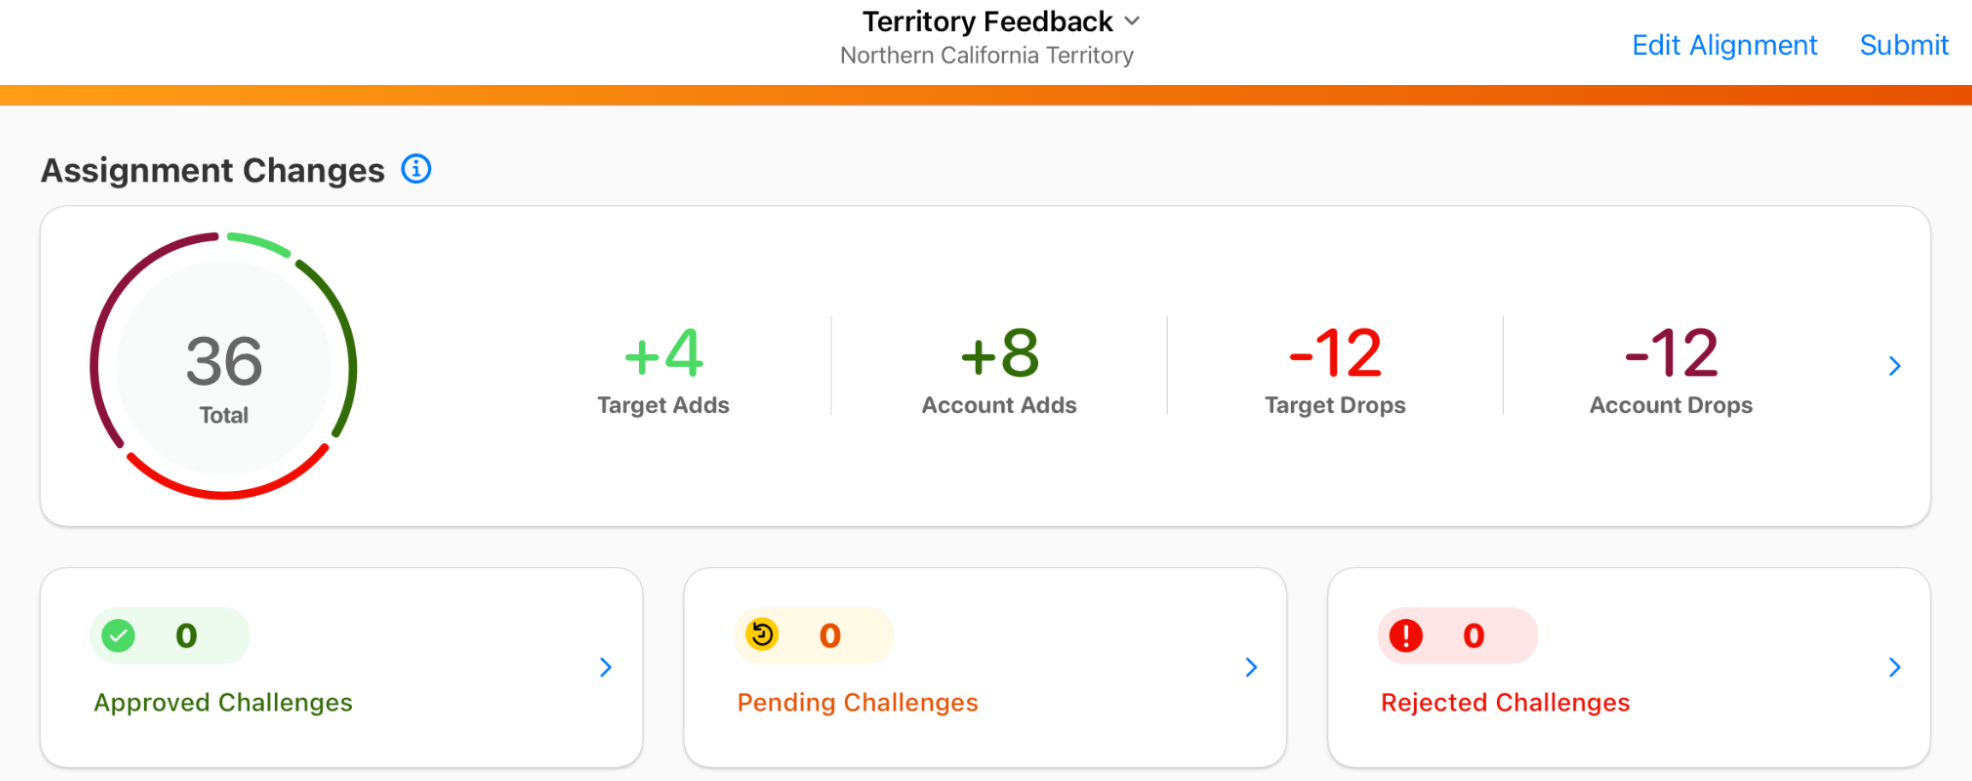
The Territory Dashboard provides an overview of how the end user’s territory will be changing. The dashboard contains the following widgets:
-
The Assignment Changes widget, which displays the following information:
- The number of changes to the end user’s list of targets, labeled Target Adds and Target Drops
- The number of accounts added or removed from the end user’s territory, labeled Account Adds and Account Drops
Selecting anywhere in the Assignment Changes widget displays the Edit Alignments table with the Adds/Drops filter automatically applied
-
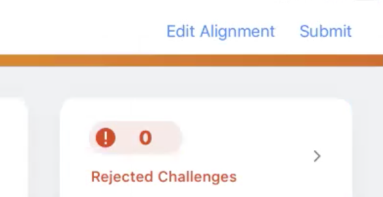
The number of Approved, Pending, and Rejected challenges – Selecting any of these widgets displays the Edit Alignments table with the appropriate challenge filter automatically applied
-
The Total Goals widget, which end users can use to view their total planned number of interactions across channels and products. Metrics are grouped by channel goals, then by product goals and include both approved and pending challenges made during Integrated Territory Feedback.
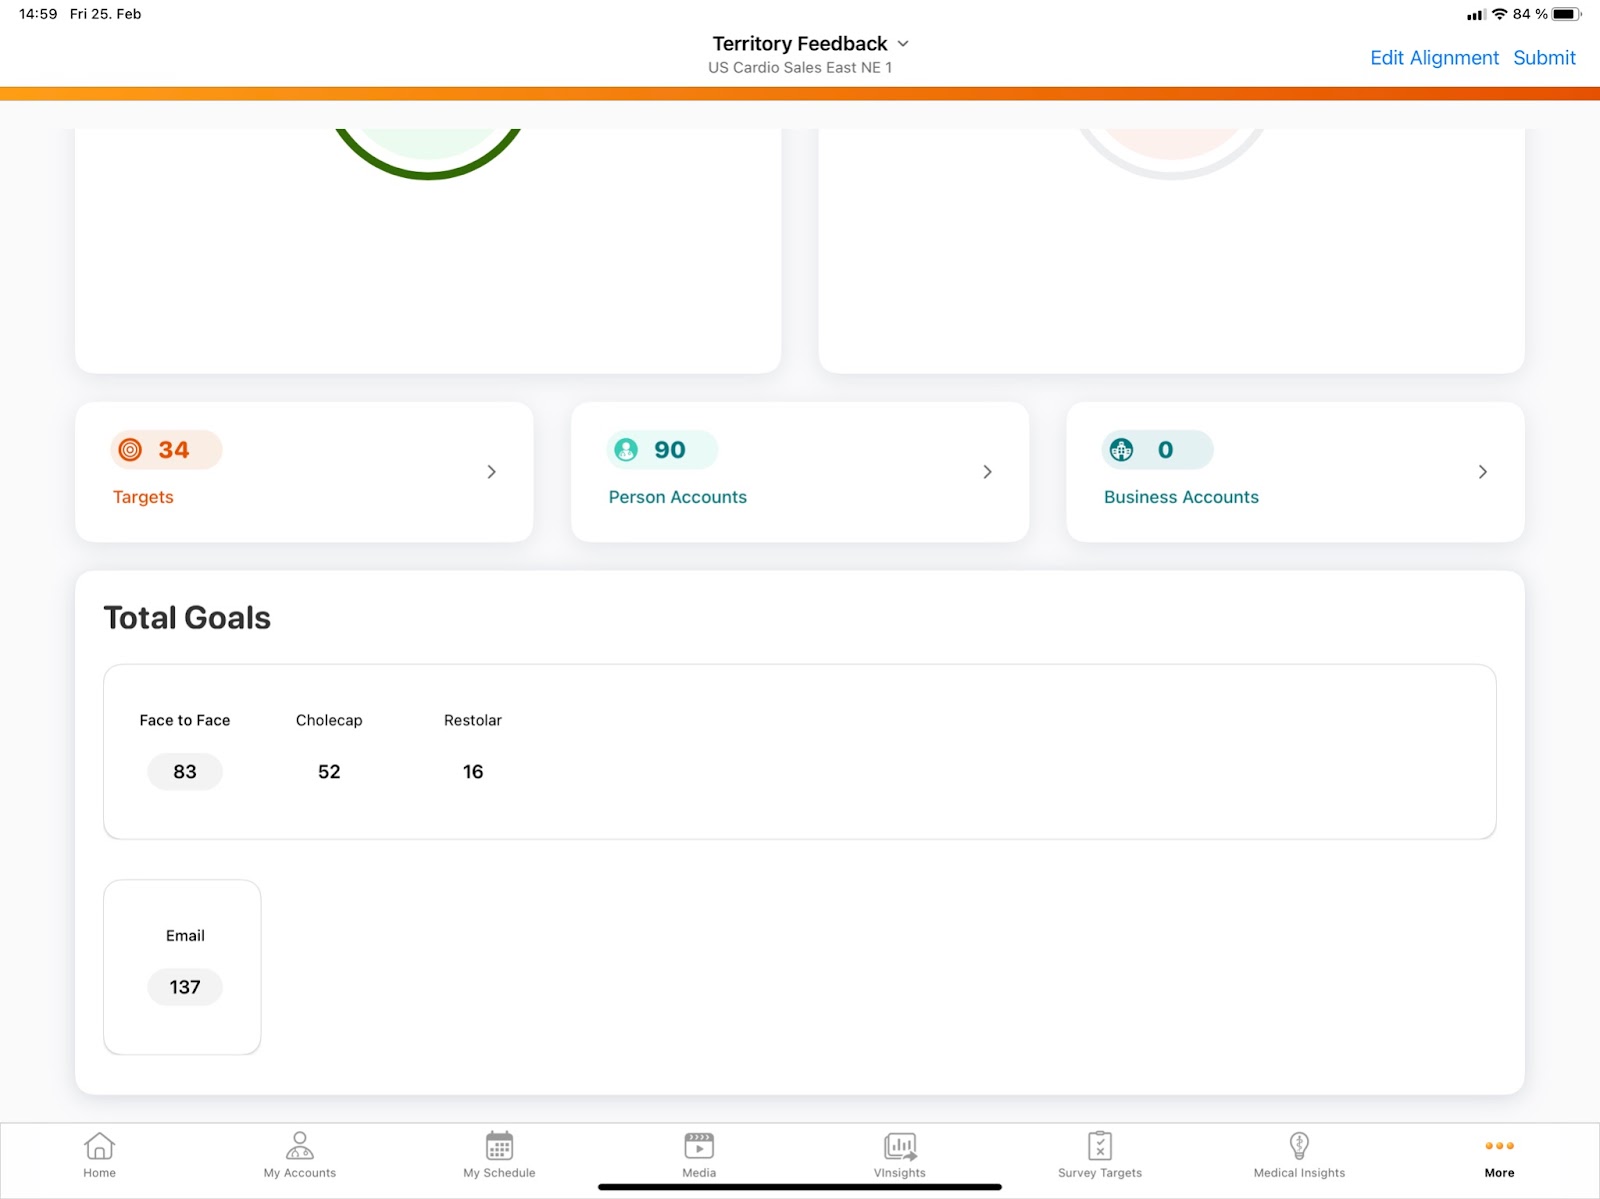
The Total Goals widget only displays if the territory has an associated Multichannel Cycle.
Viewing the Territory Dashboard When Assigned to Multiple Territories
If a user is assigned to multiple territories, a list of their assigned territories displays when they navigate to the Territory Feedback tab. Selecting a territory from this list displays the Territory Dashboard for that selected territory.
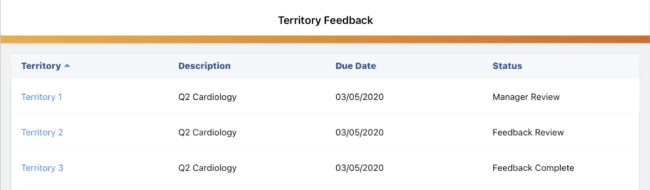
After selecting a territory, users can return to the list of territories by selecting the Back button on the Territory Dashboard.
Viewing a Future Territory
Users can view a complete list of future account assignments and targets from the Edit Alignments page, which enables users to view details about their territory, review specific changes to their territory, and create challenges. To display the Edit Alignments pages, do one of the following:
- Select the Edit Alignment button from the Territory Dashboard
- Select one of the widgets on the Territory Dashboard. This displays the Edit Alignments page with the appropriate filter applied.
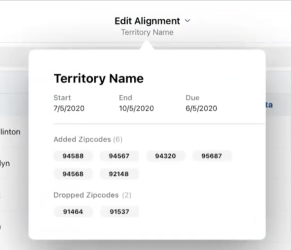
Users can view the following details about their territory by selecting the territory’s name at the top of the page:
- Territory Name
- Start and End Dates
- Due date for feedback
- Added and dropped zip codes or brick codes
-
Any configured instructions from Align
Instructions containing Markdown formatting are not supported.
Viewing Future Account Assignments and Targets
Each row in the Edit Alignments table represents an account or target. An account’s planned presence or absence in the user’s territory is indicated by one of the following two icons used to represent the account:
-
 – The account is in the user’s territory in the upcoming cycle
 -
If the account is also designated as a target, the
 icon displays next to the account
-
 – The account is a dropped account, meaning it is currently in the user’s territory but will not be in the upcoming cycle
 - Dropped accounts are listed at the bottom of the Edit Alignments table
For example, if an account is currently in the user’s territory, but is being dropped in the upcoming cycle, the account displays at the bottom of the list with the icon.
See Challenging Accounts and Targets for more information on how to challenge future territory account assignments and targets.
Viewing Segment Information
Each target in the Edit Alignments table has several additional columns defining their segment for each channel and product.
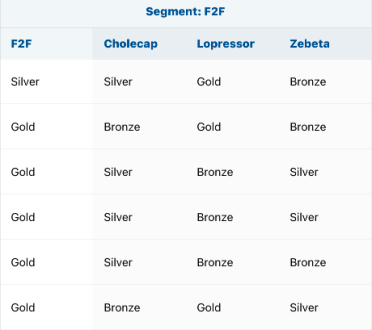
The overall channel segment is defined by the channel_segmentation_aln field on the mc_cycle_plan_channel_aln record in Align, while individual product segments are defined by the product_segmentation__v field on all relevant mc_cycle_plan_product__aln records in Align.
These columns populate automatically when using Rule-Based Targeting Assignments in Align.
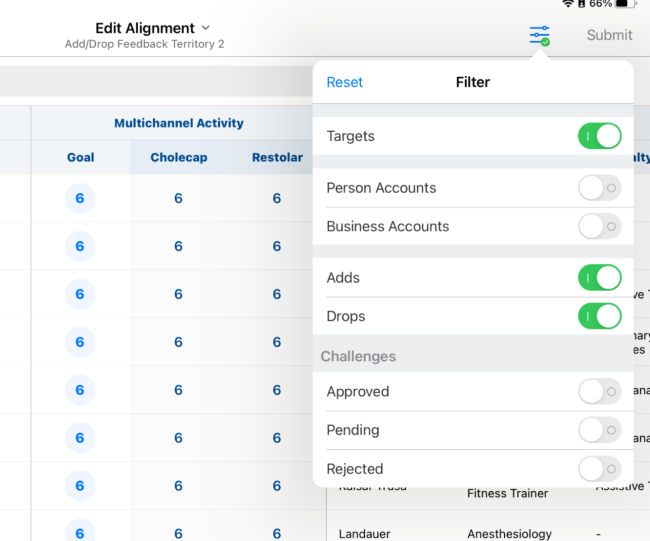
Filtering and Searching for Accounts
A variety of methods are available to users to help them filter or search their future territory:
- Selecting the Filter button displays the filter popover. This popover contains toggles that can be enabled or disables to filter the list of accounts in the table:
- Targets
- Person Accounts
- Business Accounts
- Adds
- Drops
- Approved Challenges
- Pending Challenges
- Rejected Challenges
-
Selecting the search bar enables the user to search all information in the Edit Alignments table. The entered search string is broken up into space-separated tokens. A match occurs if all of the search tokens appear in the available Account and Address text fields.
Viewing Account and Target Changes
Account and target adds and drops are labeled in the Edit Alignments table in the Adds/Drops column.
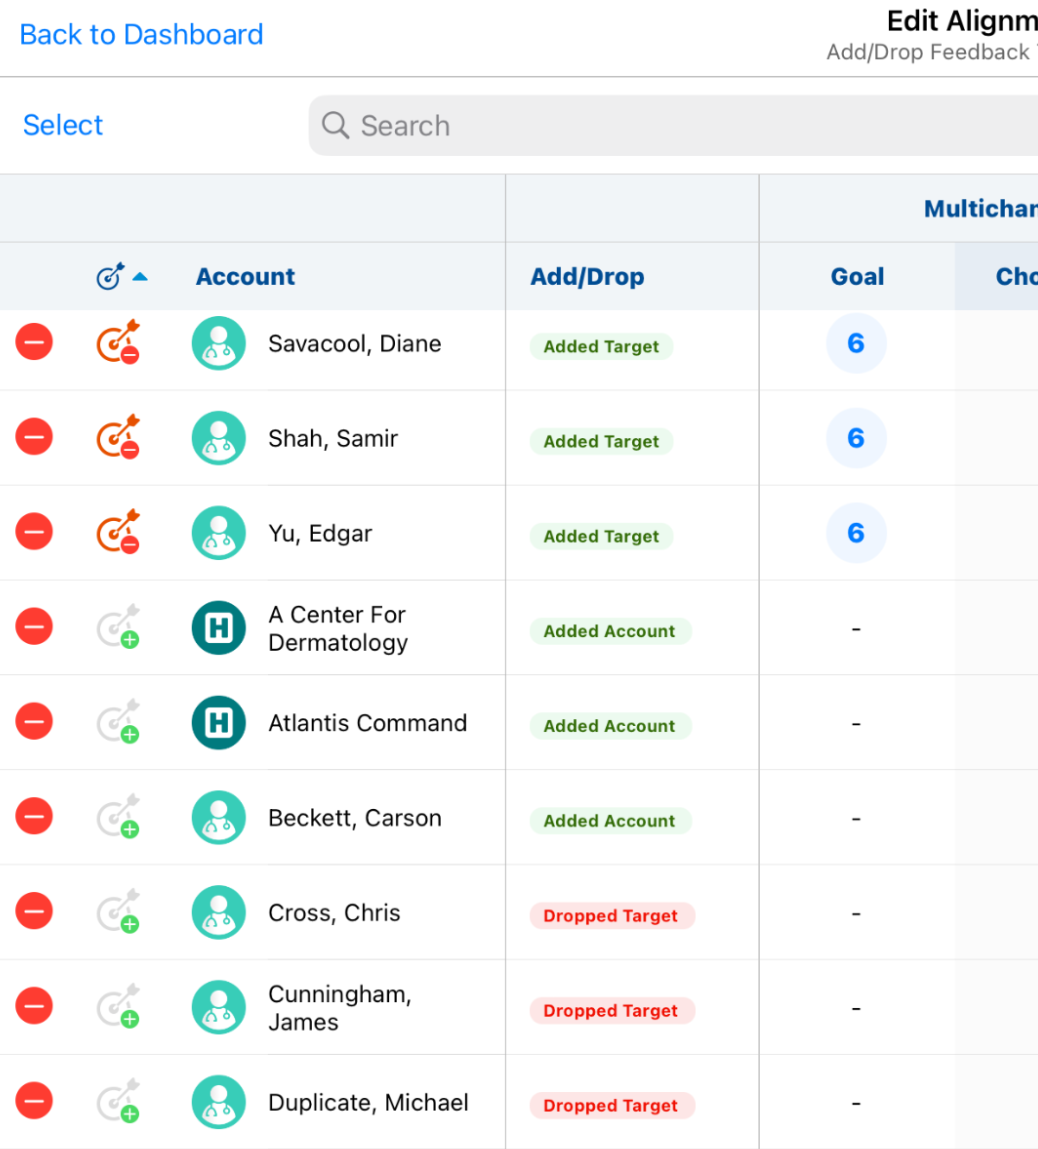
Only one value displays in the Add/Drop column, with target changes prioritized over account assignment changes. For example, if an account was removed from the territory and was also a target, Target Dropped displays in the Add/Drop column. This also applies to accounts and targets added to the territory in the upcoming cycle.
Enabling the Targets filter, and either of the Adds or Drops filters, simultaneously filters the table to display specifically targets added or dropped from the territory in the upcoming cycle. Selecting either the Adds or Drops filters without the Targets filter displays both target and account changes.
Using the Account Profile View
Selecting the name of an account in the Edit Alignments table displays the account’s profile. End users can view more details about the account, for example, additional fields that are not displayed on the grid, as well as a list of all addresses associated with the account.
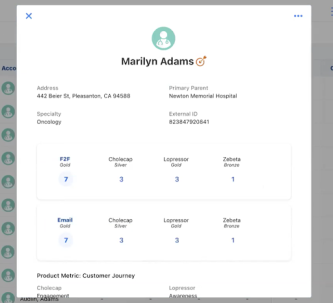
The list of fields on the account profile can be customized. See Basic Integrated Territory Feedback Configuration for more information.
Challenging Future Account Assignments and Targets
Challenges can be made against individual accounts or made in bulk.
Challenging Accounts and Targets
Users may want to challenge an account or target based on their experience in the field, for example, if the user believes the account is a high priority. Users can challenge accounts or targets directly from the Edit Alignments table.
To challenge an account or target:
- Navigate to the appropriate account in the table.
- Select the appropriate challenge icon.
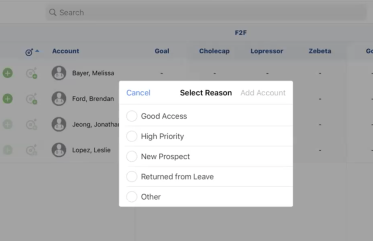
-
Select appropriate reason(s).
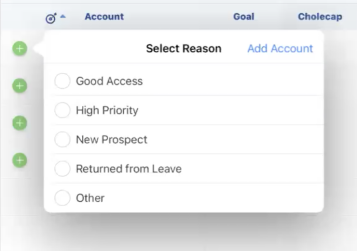
- Select Add Account/Remove Account/Add Target/Remove Target.
The challenges then run against all configured Approval Rules in Align, resulting in one of three outcomes:
- Approved (
 ) – The challenge did not match any Rejected-type rule and also matched an Approved-type rule
 -
Rejected – The challenge matched a Rejected-type rule. When account or target challenges are rejected, a Rejected slide drop menu displays. Users can view the reason their challenge was rejected by selecting the Learn More button in the slide drop menu.
Rejected challenges do not update the account icon’s border or sub-icon as the challenge was ultimately never committed.
- Pending (
 ) – The challenge did not match an Approved or Rejected-type rule and must be reviewed by management
Users can continue to create challenges on other accounts while challenges are being processed.
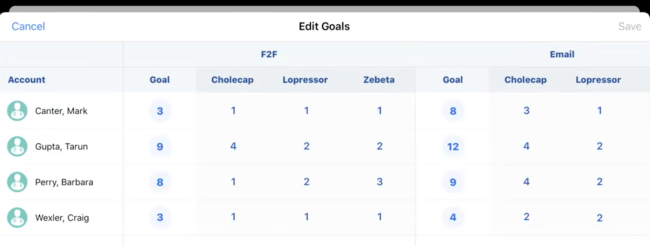
Creating Edit Goals Challenges
If an account is marked as a target, users can challenge the target’s upcoming channel and product interaction goals by creating Edit Goals challenges. Users may want to update these goals based on a target’s accessibility or priority.
To create an Edit Goals challenge:
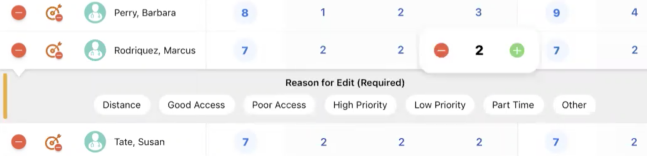
- Navigate to the appropriate account in the table.
- Select the appropriate channel or product goal.
- Add or subtract from the goal.
-
Select the appropriate reason or reasons for editing the goal.
- Repeat this process for all appropriate goals for the same account. The challenge automatically submits in the background when the user performs any other action.
The challenges then run against all configured Approval Rules in Align, resulting in one of three outcomes:
- Approved () – The challenge matched an Approved-type rule and did not match a Rejected-type rule
-
Rejected (
 ) – The challenge matched a Rejected-type rule. Users can view the reason their challenge was rejected by selecting the Learn More button.
When a challenge is rejected, users must resolve the rejection before they can navigate away from the Edit Alignments screen or submit territory feedback. Users can resolve challenge rejections using one of the following methods:
- Select the Revert button to undo the Edit Goal challenge on the account
- Update the Edit Goals challenge and re-submit the challenge
- Pending () – The challenge did not match an Approved or Rejected-type rule and must be reviewed by management
Users can continue to log challenges on other accounts while feedback is being processed.
Bulk Challenges
To enable users to quickly make the same type of challenge to multiple accounts at once, rather than creating each challenge individually, users can challenge multiple accounts at once using bulk challenges.
To create a bulk challenge:
- Navigate to the Edit Alignments table.
- Select the Select button in the top right corner of the screen.
-
Select up to 50 appropriate accounts.
-
Select the appropriate challenge from the account controls or from the buttons at the bottom of the screen. Challenges display as available for selection based on the following table:
Removed Account Selected
Non-Target Selected
Target Selected
Available Challenges


- Remove Account
- Remove Target
- Edit Goals
- Remove Account
- Remove Account
- Remove Target
- Edit Goals
- Add Account
- Add Target
- Remove Account
- Remove Target
- Edit Goals
- Remove Account
- Add Target
- Remove Account
- Remove Target
- Edit Goals
After selecting the challenge type, the following additional steps must be completed depending on the challenge type.
Creating Account and Target Challenges
For Add/Remove Account and Add/Remove Target challenges, the challenge reason modal displays after selecting the challenge type.
To finish creating an account or target bulk challenge:
-
Select the appropriate challenge reason. The selected reason is applied to all accounts in the bulk challenge.
- Select the button in the top-right corner of the modal. The name of this button is based on the challenge type. For example, Remove Account.
All rows involved in the bulk challenge are locked until the challenge is processed
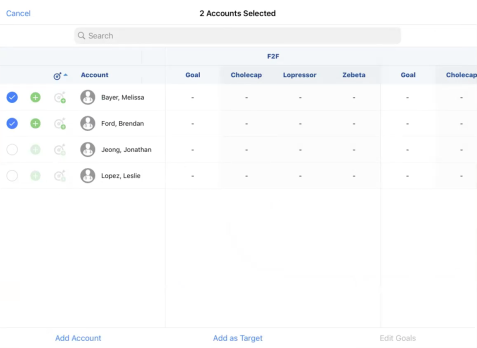
Creating Bulk Edit Goals Challenges
After Selecting the Edit Goals challenge, the Edit Goals modal displays with all targets included in the bulk challenge.
If non-target accounts were included in the bulk challenge, they are excluded from this modal.
To finish creating an Edit Goals bulk challenge:
- Select the appropriate overall, channel, or product goal.
-
Add or subtract from the goal just as users would for a singular Edit Goals challenge.
Regardless of the target’s starting goals, editing one of the target’s goals synchronizes the goals of all targets in the bulk challenge.
- Select Save.
- Select the appropriate challenge reason.
- Select Done.
All rows involved in the bulk challenge are locked until the challenge is processed
Saving and Submitting Challenges
If users wants to close the Edit Alignments page, but are not yet ready to submit all of their feedback, they can select the Done button. Selecting this button displays the Territory Dashboard. Users can then return to the Edit Alignments page at a later time to continue providing feedback.

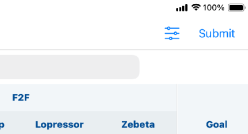
After making all appropriate feedback challenges, users can submit their feedback from one of the following locations:
-
From the Territory Dashboard page
-
From the Edit Alignments table
Users must resolve any auto-Rejected challenges before submitting feedback.
Users are not able to make further challenges after submitting their feedback. If a user wishes to make challenges after submitting their feedback, the territory must be moved back to feedback by their manager.

