Managing Engage Licenses
Align admins can add and remove Vault CRM users from Engage and Engage Connect groups directly in Align. This enables admins working with Align-mastered roster members to manage their users’ group memberships without needing to use both Vault CRM and Align. Managing license membership from Align also ensures users have their Engage licenses automatically revoked when they are inactivated from Vault CRM, so they can be reused for new employees.
Configuration
This feature requires configuration in both Vault CRM and Align.
Vault CRM Configuration
The following Vault CRM configuration describes how to enable this feature for both Engage Groups and Engage Connect Groups. However, each one of these may be configured independently:
-
Ensure the appropriate features are enabled. These features can be configured together or used independently:
-
Grant the integration user the following permissions:
Object
Object Permission
Object Types
Fields
Field Permission
user__sys
CRE
n/a
- When using Engage Groups
- engage_group_request__v
- engage_group_provisioning_status__v
- engage_group__v
- remote_meeting_host_id__v
- remote_meeting_host_token__v
- When using Engage Connect Groups
- engage_connect_group__v
- engage_connect_group_status__v
- engage_connect_group_request__v
Edit
Align Configuration
To configure this feature in Align:
-
Grant the Align integration user the following permissions:
Object
Object Permissions
Fields
Field Permissions
roster_member__aln
CRE
- engage_group_request__aln
- engage_group_provisioning_status__aln
- engage_group__aln
- engage_connect_group_request__aln
- engage_connect_group_status__aln
- engage_connect_group__aln
Edit
-
Grant Align end users the following permissions:
Object
Object Permissions
Fields
Field Permissions
roster_member__aln
CRE
- engage_group_request__aln
- engage_group_provisioning_status__aln
- engage_group__aln
- engage_connect_group_request__aln
- engage_connect_group_status__aln
- engage_connect_group__aln
Edit
-
Add the following fields to the roster_member__aln object page layout:
- engage_group_request__aln
- engage_group_provisioning_status__aln
- engage_group__aln
- engage_connect_group_request__aln
- engage_connect_group_status__aln
- engage_connect_group__aln
Activating and Managing Field Mappings
- Navigate to the Integrations tab.
- Select the Gear icon next to the Vault CRM instance in the Vault CRM section.
- Select View Field Map.
- Select CRM Objects to navigate to the inbound mappings.
- Expand the Roster Member Fields section.
- Select Describe & Edit.
-
Activate the following system field mappings:
- engage_group__aln
- engage_group_provisioning_status__aln
- engage_connect_group__aln
- engage_connect_group_status__aln
-
Map the following custom field mappings:
- engage_group_request__aln – Map to the engage_group_request__v field in CRM
- engage_connect_group_request__aln – Map to the engage_connect_group_request__v field in CRM
- Select Save.
- Select Align Objects to navigate to the outbound mappings.
- Expand the Roster Member Fields section.
- Select Describe & Edit.
-
Activate the following system field mappings:
- engage_group_request__aln
- engage_connect_group_request__aln
- engage_group_provisioning_status__aln
- engage_connect_group_status__aln
- Select Save.
Importing Engage License Information into Align
After activating the appropriate field mappings, admins can import Engage and Engage Connect group information by importing from Vault CRM.
To facilitate migrating data from CRM, the following fields are populated for all roster_member__aln records, even if the record is mastered by Align:
- engage_group__aln
- engage_connect_group__aln
- engage_group_status__aln
- engage_group_connect_status__aln
Activating Engage and Engage Connect Membership Management
Once the import completes, edit the CRM integration record to enable Align to manage Engage and Engage Connect membership:
- Navigate to the Integrations tab.
- Select the Gear icon next to the Vault CRM instance in the Vault CRM section.
- Select Edit.
-
Add the following values to the Manage CRM Features multiselect picklist:
- engage__aln
- engage_connect__aln – Only required when using Engage Connect
- Select Save.
- Push to CRM.
Assigning Users to Engage and Engage Connect Groups in Align
Membership to both Engage and Engage Connect groups is managed via request fields:
- Navigate to the appropriate roster_member__aln record.
-
Populate the appropriate fields:
- engage_group_request__aln – Populate with the name of the Engage group the user should be added to
- engage_connect_group_request__aln – Populate with the name of the Engage Connect group the user should be added to. This field is only required when using Engage Connect.
-
Select Retry Request for the following fields. This step is only necessary when updating existing roster members and ensures the assignment is sent to Vault CRM during the next push:
- engage_group_provisioning_status__aln
- engage_connect_group_status__aln – Only required when using Engage Connect
- Select Save.
If an import from Vault CRM occurs after Engage license updates are made to existing roster members in Align, those updates will be overwritten by the values from CRM. Therefore, it is recommended to push these updates to Vault CRM before running an import. If a new roster member is created, Engage license updates are not overwritten, since the record does not yet exist in Vault CRM.
The assignment request is processed during the next push to Vault CRM. After the push, the engage_group_provisioning_status__aln and engage_connect_group_status__aln picklists update to indicate if the assignment request was successful:
- Request Sent – The request has not yet been processed by the Engage server
- No Licenses Remaining – The request failed due to a lack of available licenses. This value only applies to the engage_group_provisioning_status__aln picklist.
- Invalid Group Name – The entered group name did not match a group name on the Engage server
- User not in Connect – The requested user is not configured to use Engage Connect. This value only applies to the engage_connect_group_status__aln picklist.
- User Create Failed – The requested Engage Connect user could not be created. This value only applies to the engage_connect_group_status__aln picklist.
- User Update Failed – The requested Engage Connect user could not be updated. This value only applies to the engage_connect_group_status__aln picklist.
- Request Failed – The requested assignment failed
- Success – The requested assignment succeeded
If the assignment in Vault CRM is successful, the engage_group__aln and engage_connect_group__aln fields update with the name of the Engage or Engage Connect group the user was assigned to. If the assignment in Vault CRM is not successful, review the Align error logs to view more details about the record that failed and the associated user.
- If any fields are missing or incorrect, update them, then reset the appropriate status field to Retry Request, which resends the roster member during the next push to Vault CRM
- If the issue remains unresolved, contact support for further assistance
Removing Users from Engage and Engage Connect Groups
Manually Removing Users from Engage and Engage Connect Groups
Admins can remove users from Engage and Engage Connect groups via Align as well:
- Navigate to the appropriate roster_member__aln record.
-
Populate the appropriate fields:
- engage_group_request__aln – Edit this field to be empty
- engage_connect_group_request__aln – Edit this field to be empty. This field is only required when using Engage Connect.
-
Select Retry Request for the following fields. This step is only necessary when updating existing roster members and ensures the assignment is sent to Vault CRM during the next push:
- engage_group_provisioning_status__aln
- engage_connect_group_status__aln – Only required when using Engage Connect
- Select Save.
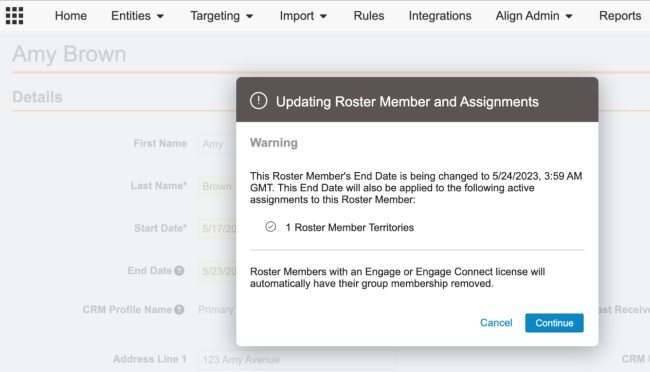
Automatically Removing Users from Engage and Engage Connect Groups
If a roster member is either manually inactivated in Align by updating the crm_user_status__aln field to inactive__aln, or if the roster member record is inactivated due to the record being end-dated, they are automatically removed from their Engage and Engage Connect groups during the next push to CRM.